2.4 Activating a Plugin on Your Site
After you buy a Tangible plugin, you need to connect it to the WordPress site where you want to use it. The connection is made by entering your license key into the plugin's settings, which tells Tangible Cloud which site is using this license. Once the connection is made:
- Tangible Cloud records the site under Websites and counts the activation against your license's activation limit.
- The plugin can check for and receive updates through Tangible Cloud.
- Features that require a valid license become available in the plugin.
Before you begin
You need:
- A WordPress site where you can install plugins. If you need help setting one up, see the WordPress user documentation.
- A Tangible Cloud account with at least one license for the plugin you want to activate. If you don't have one yet, see Buying Your First Product.
- Your license key from Tangible Cloud. You can copy it from Licensing in the left navigation.
Step 1: Download the plugin zip
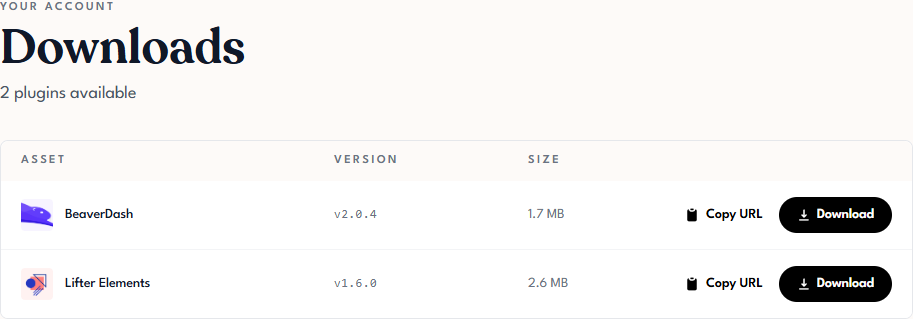
- In Tangible Cloud, click Downloads in the left navigation.
- Find the plugin in the list and click Download to save the plugin zip file to your computer.
If you'd rather pass the file directly into a deployment pipeline, click Copy URL instead of Download to get a link to the plugin zip.
Step 2: Install the plugin in WordPress
- Sign in to your WordPress site's admin area.
- Go to Plugins → Add New Plugin → Upload Plugin.
- Choose the zip file you downloaded from Tangible Cloud and click Install Now.
- When installation finishes, click Activate Plugin.
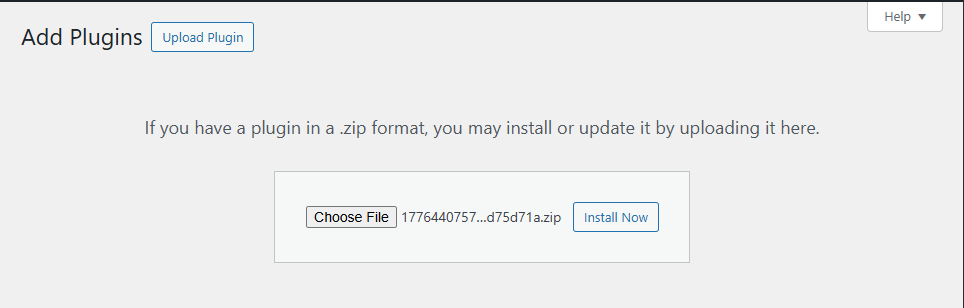
For the general WordPress plugin upload process, see the official plugin installation guide.
Step 3: Enter your license key
Each Tangible plugin adds a License tab to its own settings page in WordPress. The exact path to that tab depends on the plugin. For example, Lifter Elements puts it under the Lifter Elements settings menu, and BeaverDash puts it under its own menu. The plugin-specific documentation for each plugin has the exact location.
Once you find the License tab:
- Copy your license key from Tangible Cloud under Licensing. Click the copy icon beside the masked key to copy it in full.
- Paste the key into the License Key field on the plugin's License tab.
- Click Activate (or the equivalent button shown by the plugin).
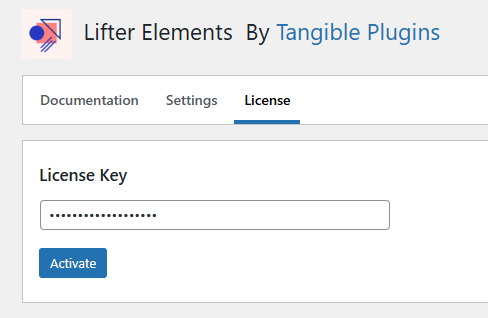
The exact tab location varies per plugin; this example shows Lifter Elements.
Step 4: Confirm the activation worked
Back in Tangible Cloud:
- Go to Licensing and open the license you just used.
- Open the Websites tab. Your site appears in the list with a status of Active, alongside its installed plugins and last-seen time.
- Go to Websites in the left navigation. Your site also appears there, with the plugin listed under it. Sites on local or development hosts (
.local,.test,.dev, and similar) appear under the Dev tab and don't count toward your activation limit.
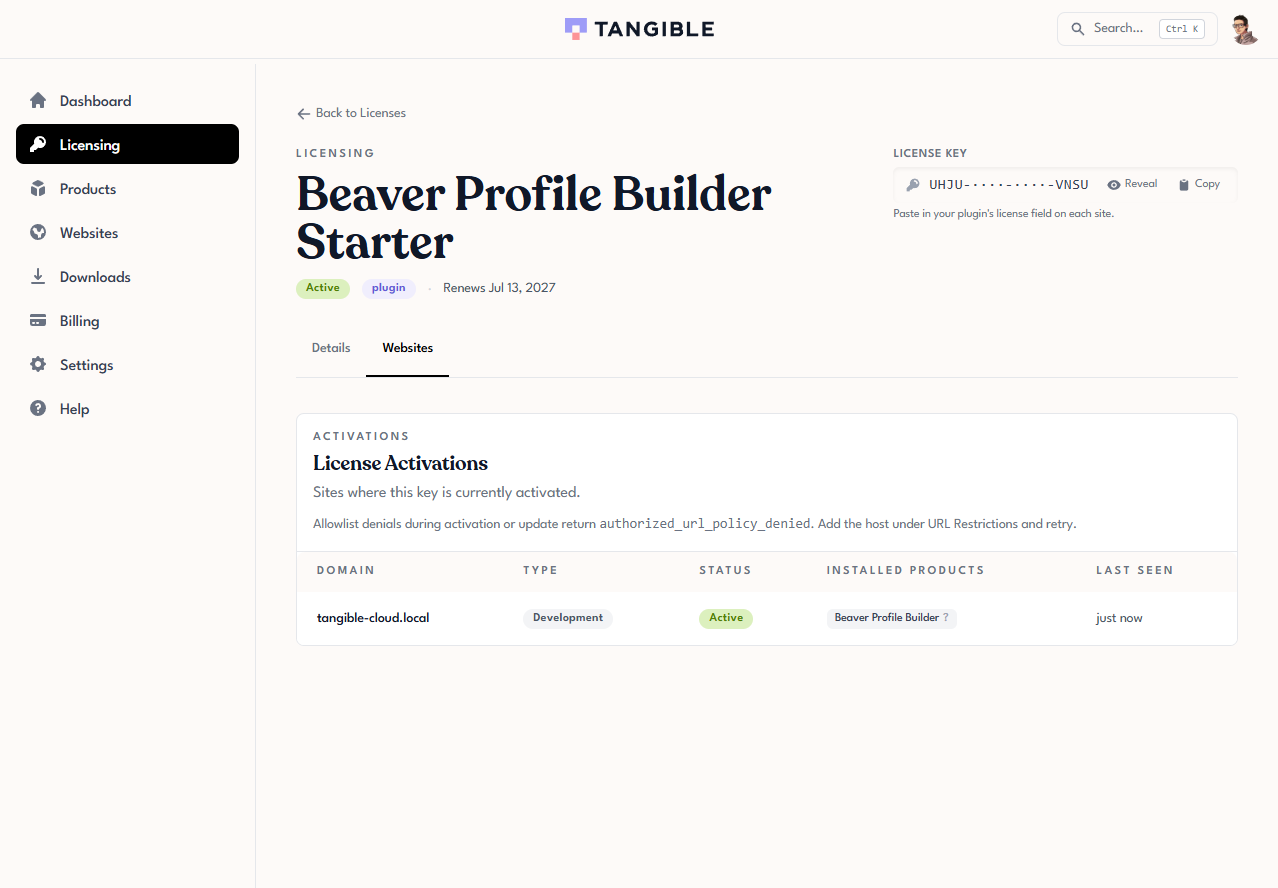
Back in WordPress, the plugin's License tab should show the license as active, and any previously-locked features should be available.
Troubleshooting
The plugin reports authorized_url_policy_denied
This error means an account-level domain rule is refusing the site you're activating. Either the Allowlist doesn't include it, or the Blocklist matches it.
- In Tangible Cloud, go to Websites → Allowlist. If the Allowlist has entries, add the new site's hostname and retry. If the site is a development or preview URL, enable Allow dev-style subdomains on the entry.
- If the Allowlist is empty, check Websites → Blocklist for a pattern that matches the site and remove it.
- Retry activation on the plugin's License tab.
See Domain Rules for the full details.
The activation count doesn't increase
If you activate successfully but the activation count on the license stays the same:
- Check whether you're on a development or staging site. Activations from hosts on development TLDs (for example,
*.test,*.local,*.dev) and common dev/staging subdomains (for example,dev.example.com,staging.example.com) don't count against your license's activation limit by design. They let you work on a site in multiple environments without using extra slots. - Refresh the license detail page in Tangible Cloud. The count may update with a short delay.
The plugin says "license invalid" or "license expired"
Open the license in Tangible Cloud and check the status badge at the top of the page.
- If the status is Expired, the subscription has lapsed. Go to Billing to renew it.
- If the status is Inactive, the license has been manually disabled. Contact your organization's owner or administrator.
- If the status is Active but the plugin still rejects the key, confirm you copied the full key (not the masked preview shown in the licenses list) and that there are no extra spaces.