2.3 Buying Your First Product
Purchases in Tangible Cloud use a two-stage checkout. You pick a product and tier in the catalog, review the order inside Tangible Cloud, then hand off to Stripe to enter your payment details. As soon as Stripe confirms the payment, Tangible Cloud issues your license, subscription, and downloads. You don't need a separate Stripe account. Stripe accepts payment directly.
Browse the catalog
- In the left navigation, click Products.
- At the top of the page, click the Get More Products tab. This shows every Tangible plugin and bundle available for purchase, including products you don't yet own.
- Click any product card to open its detail page. From the detail page you can read a fuller description, view pricing tiers, and see the latest version number.
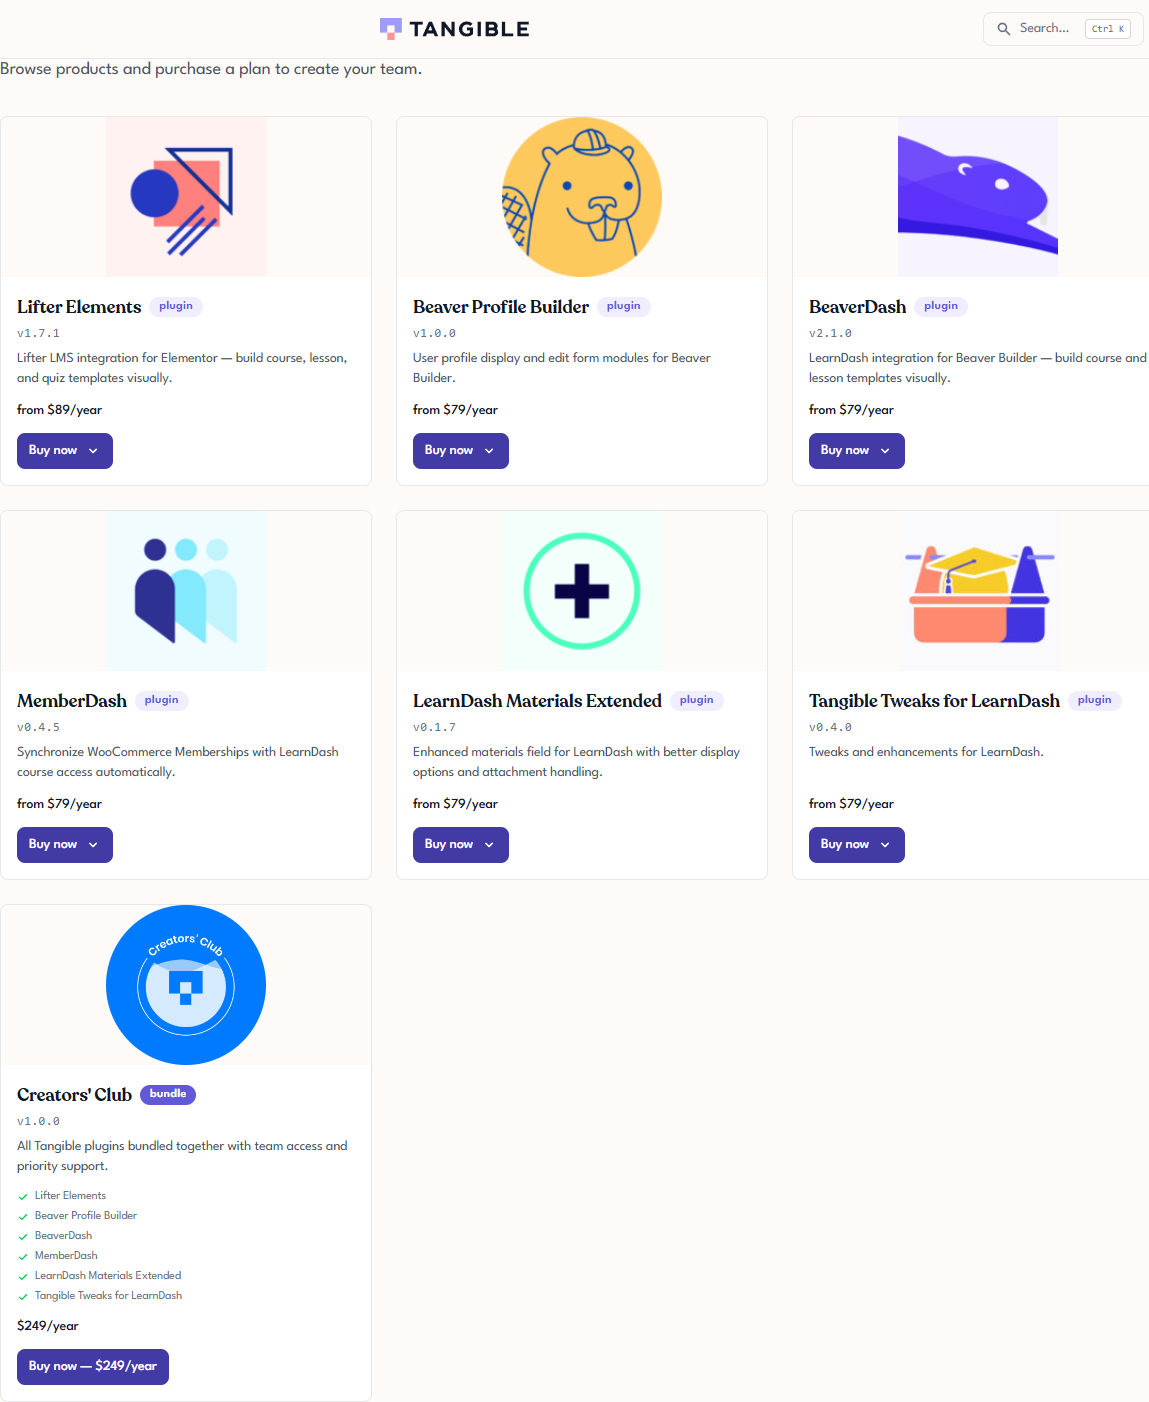
A product's detail page has three tabs: Licenses, Downloads, and Changelog. Licenses opens by default and lists the licenses you hold for that product, with the tier, the activation count, a copy-key icon, and an Upgrade option. If you don't own the product yet, the tab reads No licenses for this product yet instead.
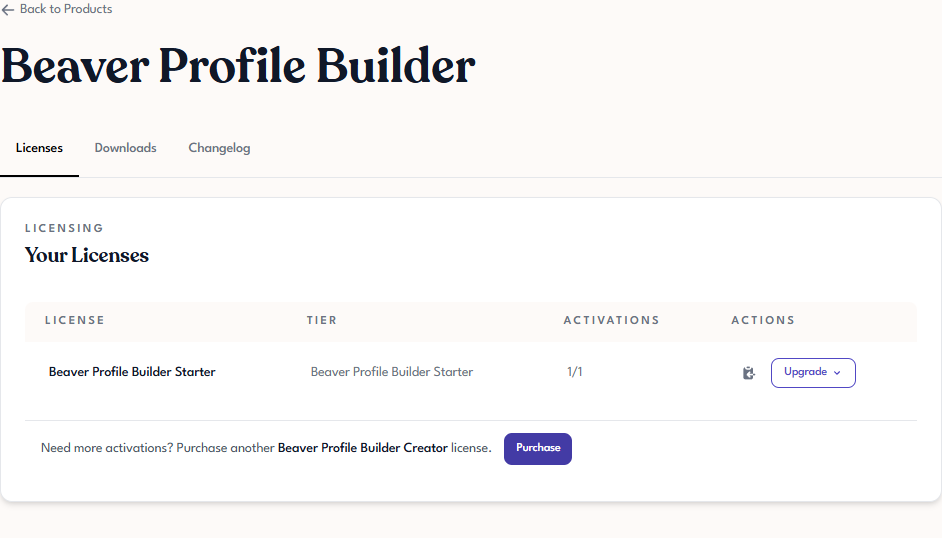
To buy a product, use the Buy now button on its card in the catalog.
If you plan to use several Tangible plugins together, Creators' Club bundles most of the catalog at a flat yearly rate. Look for the bundle badge on the catalog card to distinguish it from single-plugin products.
Stage 1: Pick a tier and review
-
On a product card (or on the product's detail page), click Buy now.
-
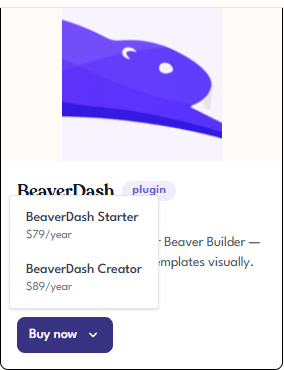
If the product offers multiple tiers (for example, BeaverDash and Beaver Profile Builder each have Starter and Creator tiers), a dropdown opens under the button. Click the tier you want.
-
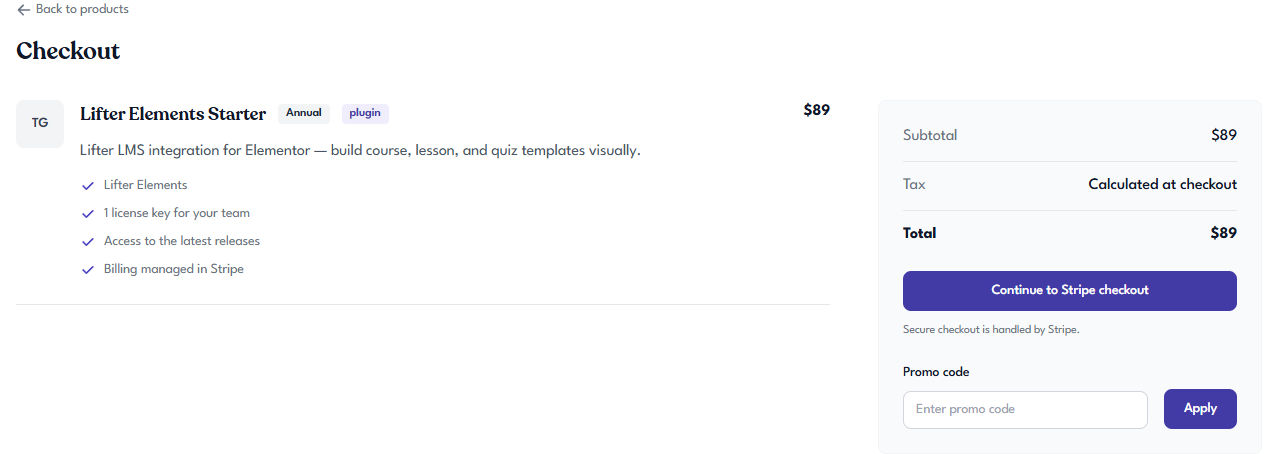
Tangible Cloud takes you to its Checkout page (still on
tangible.one): a single order-summary page for the product and tier you picked. -
Check the details:
- What's included: the product and tier, the billing period (for example, Annual), and a short feature list (license keys for your team, access to the latest releases, billing managed in Stripe).
- Subtotal / Tax / Total: the amount you'll be charged. Tax is shown as Calculated at checkout and is worked out on the Stripe step from your billing address.
- Promo code: if you have one, enter it here and click Apply to update the total.
-
When the order looks right, click Continue to Stripe checkout.
Stage 2: Enter payment details on Stripe
-
Tangible Cloud hands you off to a Stripe-hosted checkout page. The URL in your browser changes to a
checkout.stripe.comaddress. This is the only place your payment details are entered.Why the handoff happensTangible Cloud never sees, stores, or transmits your card details. The switch to
checkout.stripe.comis what keeps payment data out of our systems entirely. Stripe is a PCI-DSS Level 1 payment processor whose infrastructure is certified to handle card data. The visible URL change is also how you can verify your card details are being entered into Stripe directly, not a page that forwards them to us. For more on Stripe's security practices, see Stripe's security overview. -
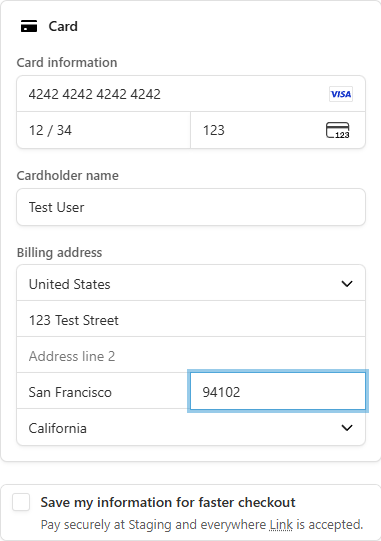
Stripe pre-fills your email from Tangible Cloud. Fill in:
- Card information: card number, expiration date, and CVC.
- Cardholder name: full name as it appears on the card.
- Billing address: country first, then the address fields the country requires. Tax is calculated from this address.
-
Optional: tick Save my information for faster checkout to register the card with Stripe Link for future purchases.
-
Click Subscribe (or the equivalent payment button for one-time purchases).
-
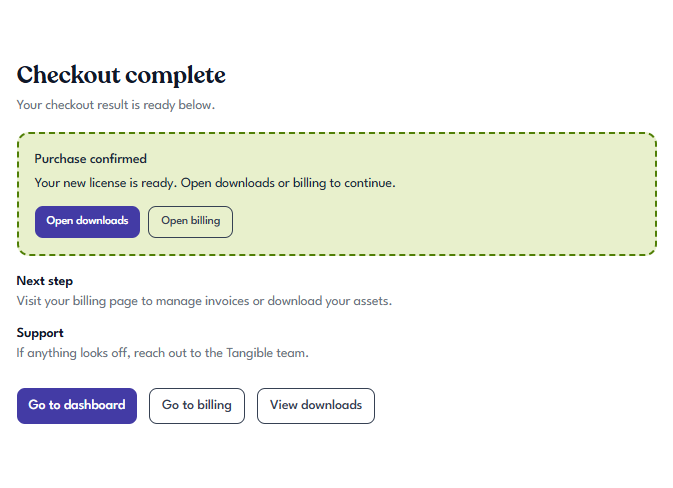
Stripe processes the payment and redirects you back to Tangible Cloud. If everything succeeded, you land on a Checkout complete page confirming the purchase, with shortcuts to your new downloads and billing:
If the card is declined
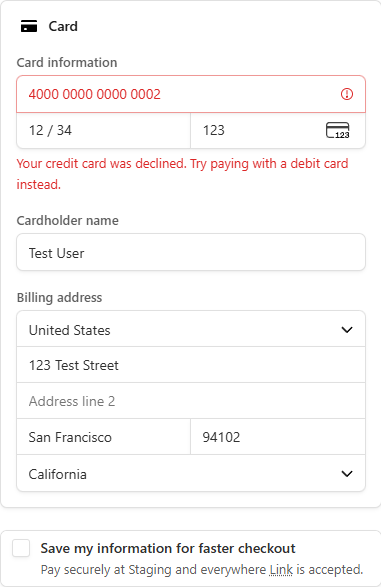
If Stripe can't process the payment (card declined, insufficient funds, typo in the card number), the Stripe page shows the specific reason inline and leaves you on the payment step to correct it. Update the card details or try a different card, then click Subscribe again.
No charge is made and no license is created when a card is declined. You can exit the Stripe page and start over with Buy now any time without consequence.
What appears in your account after a successful purchase
As soon as Stripe confirms the payment, Tangible Cloud creates three linked records for your organization:
- A license appears under Licensing with the name of the product you bought. You can copy the license key from this page to activate the plugin on a site.
- A subscription appears under Billing with the renewal date and the license it issued. From here you can later cancel the subscription or update your payment details.
- The product appears on the My Products tab of Products with an Owned badge and quick Download / Upgrade buttons. The plugin zip also becomes available on the Downloads page.
The three records normally appear within a few seconds of payment confirmation. If you refresh and don't see them, wait a minute and refresh again. Very occasionally the Stripe webhook that creates them is delayed.
Upgrading or buying more of the same product
If you need more activations of a product you already own (for example, you have a Starter-tier license for one site and want to add a second site), you have two options:
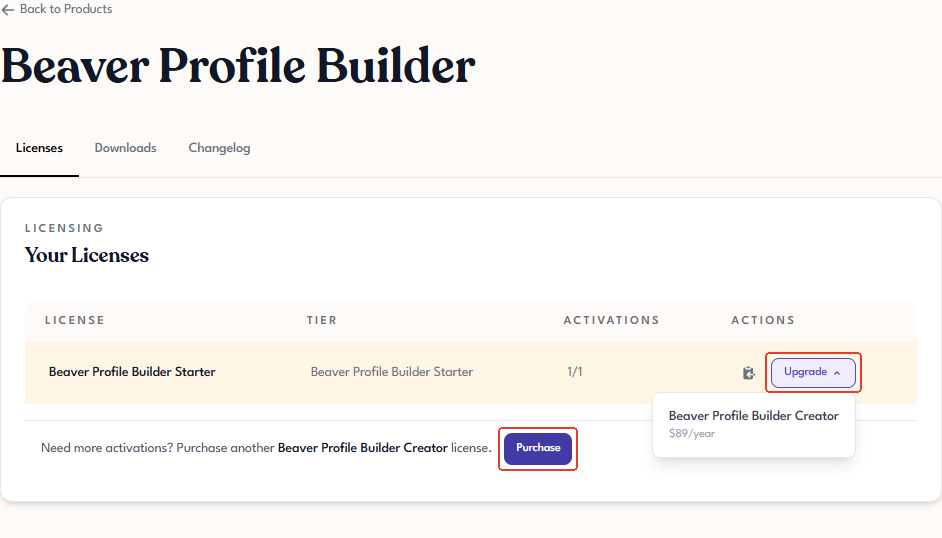
- Upgrade an existing license to a higher tier (for example, Starter → Creator) from the product detail page. Click the Upgrade dropdown next to the license and choose the tier.
- Purchase an additional license at the same tier. Click Purchase on the product detail page to buy another license of the same product.
Both controls sit on the product's Licenses tab. Upgrade is in the license row's Actions column, and Purchase is below the table, next to the "Need more activations?" prompt.
Which option fits depends on how many extra activations you need and whether the higher tier includes other features you want. Both result in more activations being available to your organization.